

 LinkBack URL
 About LinkBacks


Zbrush v.4 X86 With Tutorial
Zbrush v.4 X86 With Tutorial | 1.68 GB
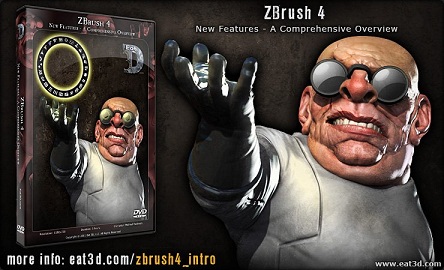
Zbrush 4 - is designed for three-dimensional simulation, created by Pixologic. A distinctive feature of this software is to simulate the process of "molding� 3d-sculpture, enhanced engine, three-dimensional rendering in real time, which greatly simplifies the process of creating the desired 3d-object. Also present in the assembly Training Video "ZBrush Masterclass Volume 1: Character Creation". Zbrush 4 Version: 1 Bit depth: 32bit Compatibility with Vista: complete Compatible with Windows 7 full time Language: English Medicine: Present Training video "ZBrush Masterclass Volume 1: Character Creation" Year: 2012 Duration: 3:25:49 Material Type: Video Tutorial Language: English Sample Files: present Video Format: AVC Video: avc1, 1024x 576, 16:9, 11.988 fps, 647 Kbps Audio: AAC, 38.0 Kbps, 1 channel, 22.05 KHz The size of the assembly: 2080,07 MB Zbrush 4 The program for three-dimensional simulation, created by Pixologic. A distinctive feature of this software is to simulate the process of "molding� 3d-sculpture, enhanced engine, three-dimensional rendering in real time, which greatly simplifies the process of creating the desired 3d-object. Each point (called piksol) contains information not only on its XY coordinates and color values, but also the depth Z, orientation and material. This means that you not only can "sculpt" a three-dimensional object, but also "paint" it by painting strokes with depth. That is, you do not have to paint shadows and highlights, so they look natural - ZBrush will do it automatically. It also works fast with standard 3d objects using a brush to modify the geometry and textures. Enables interactivity with an incredible number of polygons. Using special techniques, you can raise the tens (even hundreds) of millions of polygons. Also, there are many plug-ins (work with textures, geometry, number of new brushes, the rapid integration with professional packages 2d graphics and much more). Training video "ZBrush Masterclass Volume 1: Character Creation" Contents: Chapter 1: Generating Quick Thumbnails This first chapter we'll utilize a fun and free online doodling program called ScribblerToo to create some basic thumbnails for character ideas. We will go over what thumbnails are intended for and how they really help to kick off the design phase. Chapter 2: Thumbnails to Concepts Once we have a good variety of thumbnails created, we can then open them up in Photoshop to create some quick line art to describe basic forms and possible design features for our character. Chapter 3: ZBrush 4R2 Intro Now that we have our basic design thoughts roughed out, we can move into our favorite program for sculpting characters, ZBrush 4R2. Before beginning The Sharkyan, we will discuss my favorite brushes, alphas, matcaps, and keyboard shortcuts, among others. Also we will have an overview of the basics of interfacing with your object. Chapter 4: Dynamesh! An exciting new feature introduced in the 4R2 release, Dynamesh gives us the ability to not worry about topology at all and just focus on creating our character in a very intuitive and streamlined way. We will use it to take a sphere and turn it into a simple t-pose mesh that is ready for refining. Introducing Dynamesh into your workflow will improve your process in such a dramatic way. Chapter 5: Blocking This is the meat of the character sculpting process. Having a focused attack on building up forms is key for good character creation. We will focus on adding important shapes, utilizing both human and shark anatomy, and go over how to start implementing certain design features that will give it the personality and demeanor that starts to breathe life into The Sharkyan. Chapter 6: Adding Silhouette It's always important to make an interesting silhouette so your character will pop off the screen. In this early process of getting The Sharkyan off the ground, it's never too late to add silhouette adjustments that reinforce overall design intent and make it a stronger piece. Chapter 7: Exploring Head Designs The face of any character has so much to do with it's personality and attitude. Using layers, we will explore a few head design possibilities and show off what mixing layers can do for design discoveries. This will segue us into the next dvd in the series where we finish out the detailing and final sculpting on The Sharkyan.
Mirror:Código:http://ul.to/p924xei4/ZBRU4.part1.rar http://ul.to/t1np54ks/ZBRU4.part2.rar http://ul.to/ye8u4afc/ZBRU4.part3.rar http://ul.to/ehvq9q0f/ZBRU4.part4.rar
Mirror1:Código:http://shareflare.net/download/09523.0f8a57b3e186b81503b7794001c6/ZBRU4.part1.rar.html http://shareflare.net/download/98208.9c51e003e8232ea27999c3858fd0/ZBRU4.part2.rar.html http://shareflare.net/download/90970.98f6f68362d84bb3a446da860318/ZBRU4.part3.rar.html http://shareflare.net/download/03613.0405f88d1bf9a37031a5d32ff9c7/ZBRU4.part4.rar.html
Código:http://letitbit.net/download/88792.80e8ee3d55e19f83db9d7737b62f/ZBRU4.part1.rar.html http://letitbit.net/download/31691.3bb9034a180bad84eac18318291b/ZBRU4.part2.rar.html http://letitbit.net/download/80455.8b564c8b8c6d48cefbbe68577aed/ZBRU4.part3.rar.html http://letitbit.net/download/14848.1bbc813f6f92e1fd9a53e2422954/ZBRU4.part4.rar.html

 Citar
Citar